Talking about shoes is very well & all, but let’s take a moment & chat storage solutions, shall we?
From DIY shelving to a DIY shoe rack, there are so many interesting & viable, not to mention creative ways, to store your shoes & high heels.
And today we’ve got you covered in terms of getting it done just as real Toronto girl (or shall I say woman!?) Raz did.
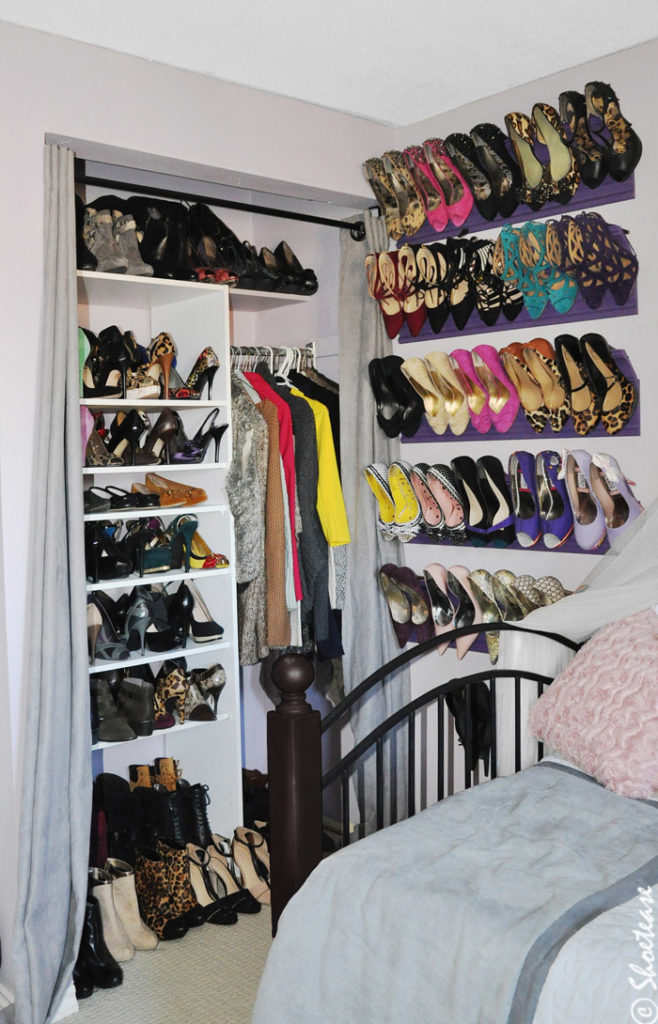
If you missed last week's post featuring this fantastic Pinterest-inspired creative shoe storage of the DIY variety, made from crown molding, you might want to go back & take a look!

And unlike the pretty Pinterest-worthy images from last week's post, this particular shoe closet entry comes with DIY instructions & supply information. Courtesy of Raz & her handy hubby.
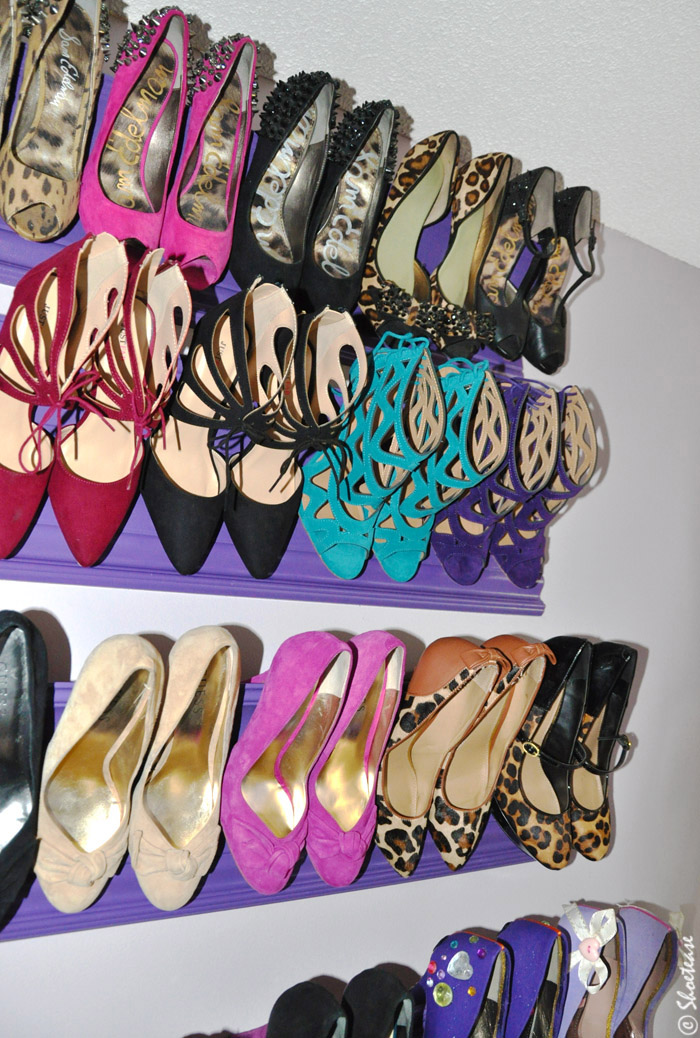
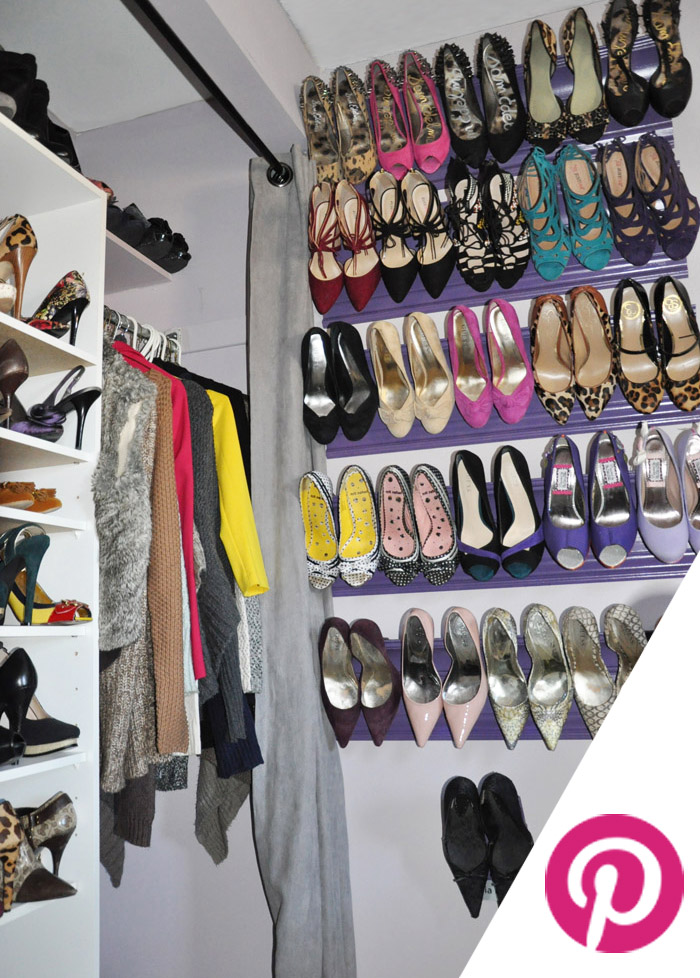
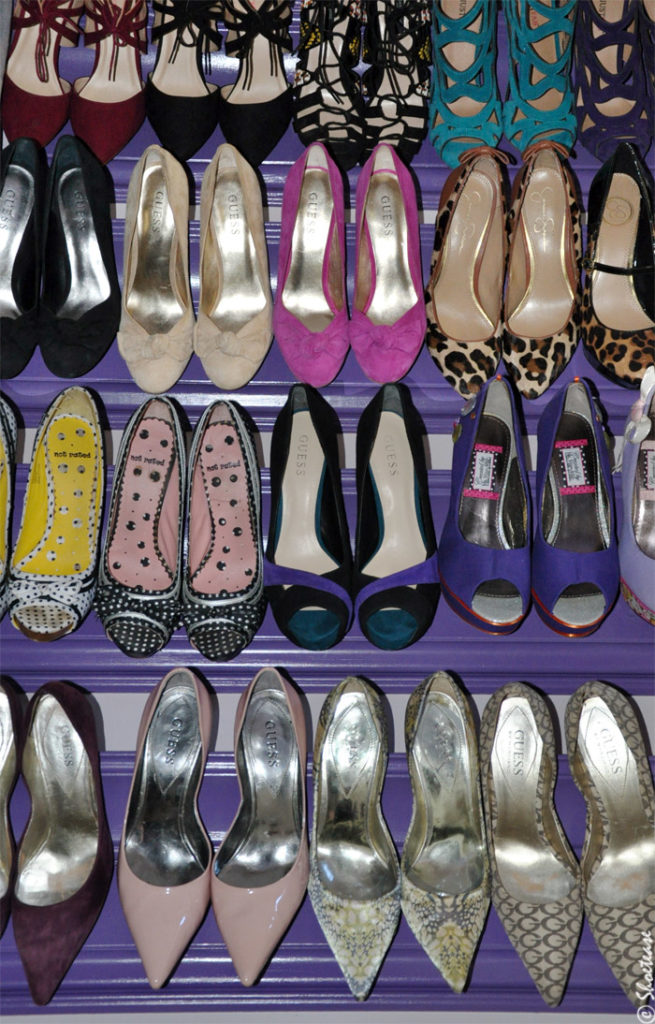
Thanks lady & gent! These fantastically executed purple DIY shoe shelves are perfect for hanging your high heels.
Why? You're not only using that useless wall space to clear your cluttered shoe closets, but you're also creating shoe wall art in the process!
Well, sort of.
This very much depends on how fabulous your high heels really are 😉 It's hard to imagine this perfect shoe set-up cost well under $100 (in Canada, US peeps will likely spend much below $50)!
How to Build a DIY Shoe Rack with Crown Molding
This idea came from an image from Pinterest that inspired the above storage solution.
Which funny enough, is also pinned to my very own Pinterest shoe storage board. Ah, great minds. Take a look at it, below, followed by an easy how-to guide.
1. Materials to Build a DIY Shoe Rack (from your local hardware store)
- crown molding
- base molding
- wood glue
- nail gun
- measuring tape
- screws
- drywall studs (if applicable, read below)
- high gloss paint with medium size paint brush or spray paint
Easy 10-Step DIY Shoe Rack Instructions
- Measure the desired length of the shoe rack
- Get your local home depot to cut each of the base molding & crown molding to the desired length
- Use wood glue to attach the crown molding onto the base molding, connecting the small angled ends to each other
- Use either nail gun or finishing nails & hammer to secure the 2 molding parts
- Let dry
- Paint with a medium or small brush, using a high gloss paint color of your choice. Or simply spray paint!
- Let dry thoroughly
- Using wood screws (2 for each shoe rack), screw into wall studs
- If you're screwing directly into drywall, insert drywall studs & screw into them
- Hang your shoes & enjoy your new DIY shoe rack!
What do you use for shoe storage for your shoes & high heels? Any tricks or tips? I'd love to know in the comments, below!
xo ShoeTease
Cristina is the chief editor & shoe expert at ShoeTease. As a seasoned stylist and women's fashion & shoe designer with over 20 years of experience, Cristina's here to guide you on your fashion journey! Learn more.
This post may contain affiliate links. ShoeTease may earn a small commission if you click through and/or make a purchase. Thanks for your support!
I need some kind of solution to my shoe addiction – and that doesn’t just mean storage! 😉
Tatyana xx
Secret little Stars
http://www.secretlittlestars.com
Ha, me too actually! I hope this closet inspires me to create a nicer environment for my shoes!!
xo Cristina